Fruity Pebbles Cookie Cheesecake Bars are one of those desserts that just make you smile. They’re bright, sweet, crunchy, and creamy all in one bite. If you’re a fan of nostalgic cereals and love a good cheesecake bar, then this colorful treat is about to become your new favorite. In this article, we’re diving deep into everything there is to know about Fruity Pebbles Cookie Cheesecake Bars—from what they are and how to make them, to storing tips, creative variations, and why everyone from kids to adults can’t get enough of them.
You’ll find step-by-step guides, expert baking tips, and storage hacks, plus we’ll answer your most burning questions (like how to keep that iconic cereal crunch intact). Whether you’re making these bars for a birthday party, bake sale, or just a fun weekend treat, you’ll be armed with everything you need for fruity, creamy success. Let’s dive in!
Introduction to Fruity Pebbles Cookie Cheesecake Bars
What Are Fruity Pebbles Cookie Cheesecake Bars?
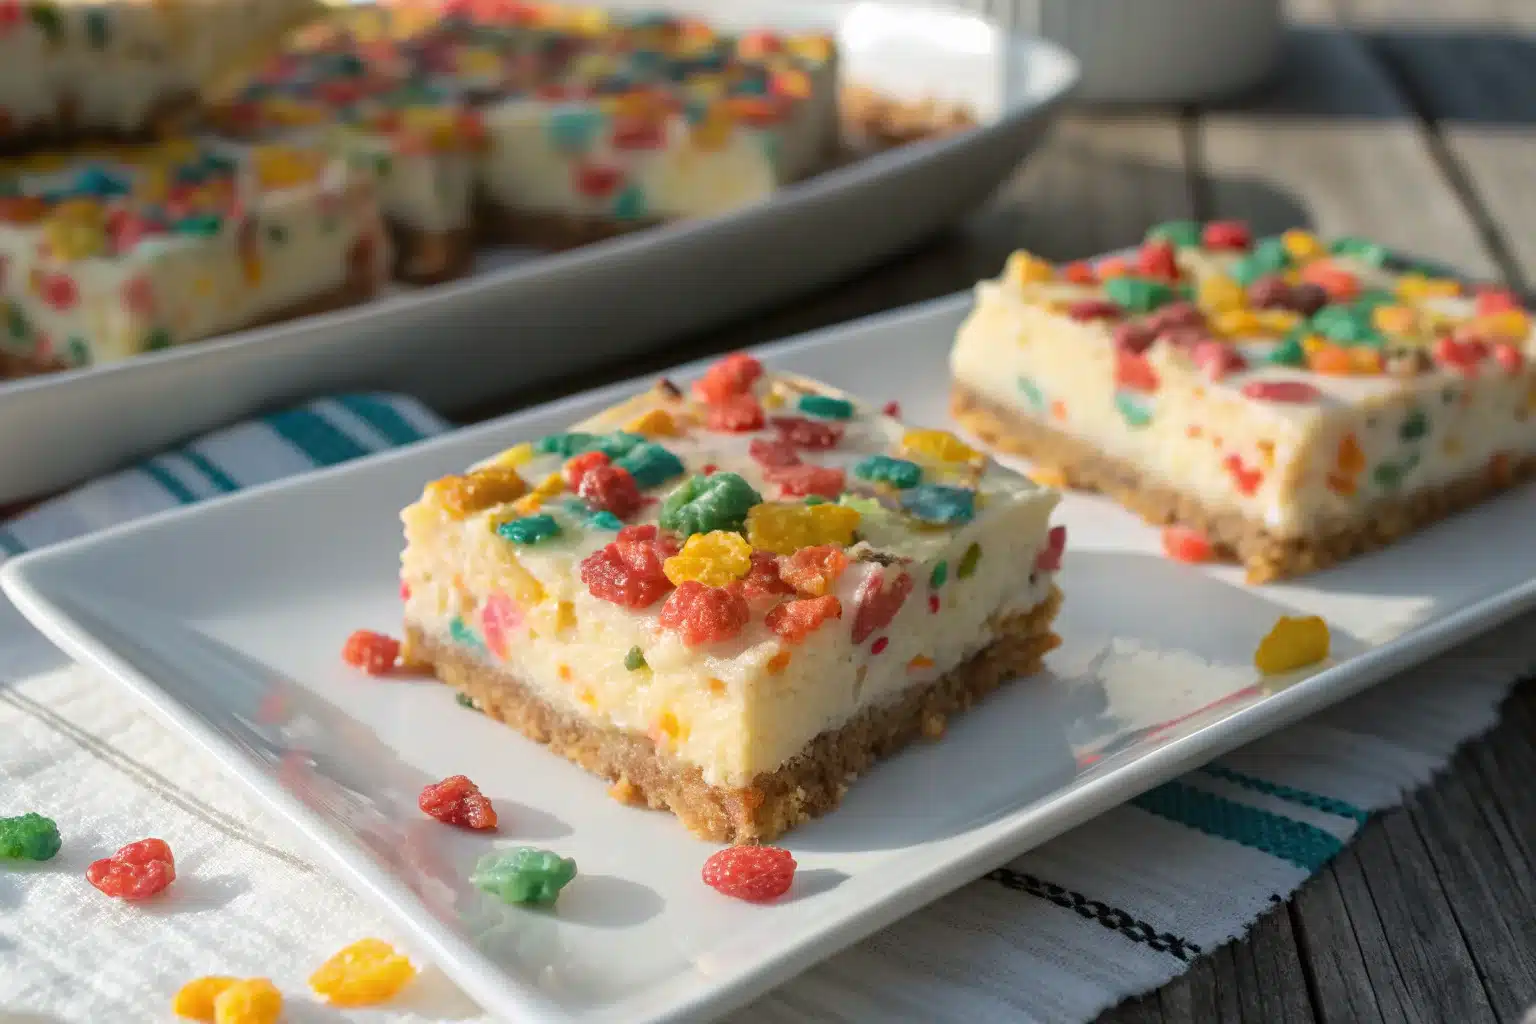
Fruity Pebbles Cookie Cheesecake Bars are a triple-layered dessert that combines a buttery cookie base, a rich cream cheese filling, and a colorful topping made from—you guessed it—Fruity Pebbles cereal. They’re the kind of treat that stops people in their tracks. Why? Because they look like a party and taste like nostalgia. Think sugar cookie meets cheesecake meets cereal bar. It’s a mashup of textures and flavors that just works.
These bars are baked, not no-bake, which gives them a soft yet stable structure perfect for slicing into squares. They’re also incredibly versatile—you can tweak the crust, add mix-ins, or even make them no-bake if you’re short on time.
The Popularity of This Colorful Dessert Bar
What’s with the sudden buzz around these rainbow-packed dessert bars? It’s not just the Instagram-worthy appearance—though let’s be real, they’re picture-perfect. It’s the flavor explosion. You’ve got the buttery cookie crust, the creamy cheesecake center, and that unmistakable Fruity Pebbles crunch up top. It’s like eating a cereal milk dream.
Beyond that, they’re simple to make and require only a handful of ingredients, making them ideal for beginners and busy bakers. You’ll spot these bars showing up at kids’ birthday parties, potlucks, and even bridal showers thanks to their vibrant look and crowd-pleasing taste.
Origins and Trend in Baking Communities
The fusion of childhood cereals with sophisticated desserts isn’t new, but Fruity Pebbles Cookie Cheesecake Bars have taken it to another level. Pinterest boards and TikTok baking trends have given these bars a serious glow-up. What started as a niche bake has now gone mainstream in home kitchens and even cafes looking to serve retro-modern snacks.
Why It’s a Hit with Kids and Adults
The dual appeal is undeniable. Kids love the rainbow crunch and candy-like flavor. Adults? Well, they get hit with a wave of nostalgia while appreciating the richness of cheesecake and the balance the cookie crust brings. Plus, they’re fun to make with the family—colorful, no complicated techniques, and ready in under an hour.
Discover great ideas like this in our Fruity Pebbles Cheesecake roundup, perfect for brightening up your dessert menu.
Ingredients You’ll Need for Fruity Pebbles Cookie Cheesecake Bars
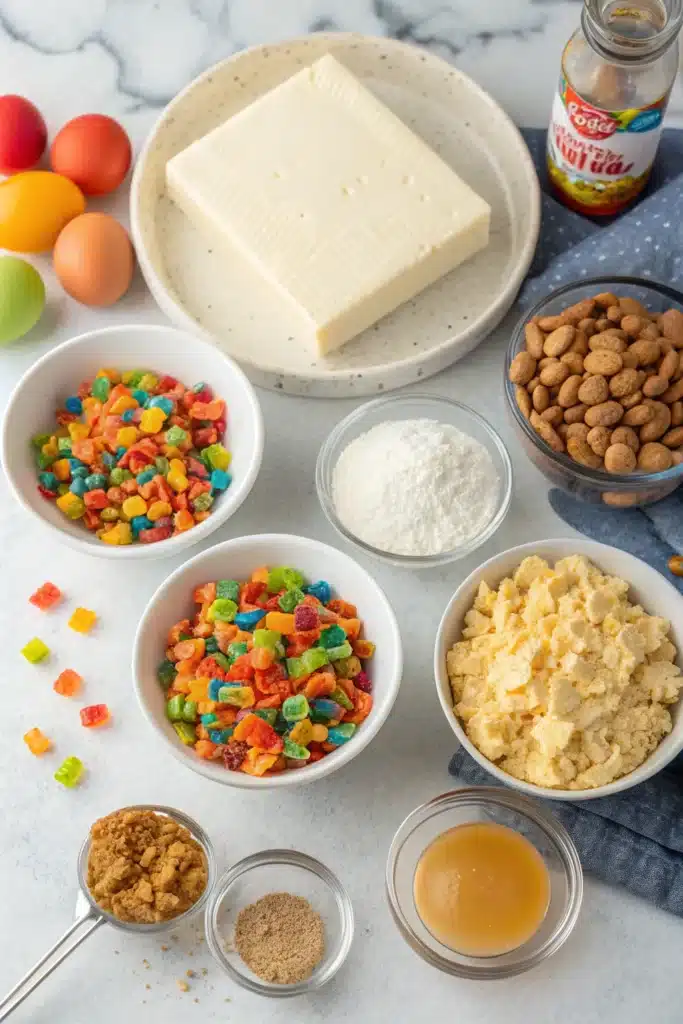
Creating Fruity Pebbles Cookie Cheesecake Bars starts with a few kitchen staples and a box of that rainbow-hued cereal magic. The beauty of this recipe is that it’s super flexible. You can keep it classic or toss in a twist—either way, you’re getting a chewy, creamy, crunchy dessert that looks as good as it tastes.

Essential Ingredients for the Base and Filling
The backbone of any good cheesecake bar is the crust and the filling. And when it comes to Fruity Pebbles Cookie Cheesecake Bars, both parts carry their weight.
Fruity Pebbles Cereal: Which Brand and Why It Matters
Yes, the cereal really matters here. You’ll want the original Fruity Pebbles for that signature bold flavor and vibrant color. Generic brands might save a buck, but they often fall short in crunch and taste. Trust us—you don’t want a dull, soggy topping.
| Ingredient | Purpose |
|---|---|
| Fruity Pebbles cereal | Adds crunch, color, and fruity flavor |
| Butter | Binds the cereal for a sticky, firm top |
| Sugar cookie dough | Forms the chewy base |
| Cream cheese | The core of the creamy cheesecake layer |
| Egg | Helps firm the filling when baked |
| Sugar & vanilla | Sweetens and flavors the cheesecake |
Cookie Dough vs Homemade Sugar Cookie Crust
You can absolutely make your own sugar cookie crust—but no shame in grabbing a roll of pre-made dough. If you’re in a rush, store-bought cookie dough saves time and still delivers buttery goodness. But if you’re feeling fancy, homemade dough lets you adjust sweetness and texture to your liking.
Optional Add-ins for Extra Flavor
Want to kick things up a notch? A few creative mix-ins can make your bars feel even more indulgent—or just extra fun.
White Chocolate Chips, Marshmallows, or Creamers
- White chocolate chips melt into the cheesecake layer, adding richness without overpowering the fruity notes.
- Mini marshmallows give you that Rice Krispie Treat vibe when added to the cereal topping.
- A splash of vanilla or fruity coffee creamer into the cheesecake base? Game-changer. It boosts the milk flavor and pairs perfectly with the cereal theme.
You could also stir in a spoonful of rainbow sprinkles or use flavored cream cheese (hello, strawberry!) for a unique twist.
Don’t miss our Old-Fashioned Peach Cobbler Recipe for a warm, nostalgic dessert that perfectly complements fruity treats like cheesecake bars.
How to Make Fruity Pebbles Cookie Cheesecake Bars Step-by-Step
Now that you’ve got your ingredients lined up, it’s time to transform them into Fruity Pebbles Cookie Cheesecake Bars—a dessert that’s equal parts fun and flavorful. The process is simple, and with a little love and layering, you’ll have a colorful batch ready to wow your taste buds and your Instagram followers.
Prepping the Crust and Pan
Before anything else, preheat your oven to 350°F (175°C) and get your baking pan ready. A 9×9-inch square pan is the sweet spot—big enough for nice thick bars, small enough for them to bake evenly.
Lining and Greasing for Easy Removal
Line your pan with parchment paper and let the edges hang over the sides. This makes lifting the bars out a breeze once they’re cooled. A light spritz of non-stick spray over the paper doesn’t hurt either—insurance for a clean release.
Spreading the Cookie Crust Base Evenly
Take your sugar cookie dough—either pre-made or homemade—and press it evenly into the bottom of the pan. Use your fingers or a small offset spatula to make sure it’s smooth and flat. Bake this layer for 8–10 minutes until it’s just set (not golden brown—remember, it’ll bake again).
Mixing the Creamy Cheesecake Layer
Now comes the heart of the bar: the luscious cheesecake filling. Room temperature cream cheese is key—cold blocks will leave lumps, and nobody wants a bumpy cheesecake bite.
Blending Cream Cheese, Egg, Vanilla & Sugar
In a large bowl, beat the cream cheese until silky smooth. Add the egg, vanilla extract, and sugar, then continue beating until you get a creamy, pourable consistency. Don’t overmix—you want it smooth, not airy.
Pro Tip: Scrape down the sides of the bowl so you don’t get uneven flavor or texture.
Pouring and Leveling the Cheesecake Filling
Once your base has cooled for 5–10 minutes, pour the cream cheese mixture over it. Use a spatula to spread it evenly corner to corner. Smooth tops make pretty bars.
Creating the Fruity Pebbles Topping
This is the part where the bars go from basic to beautiful.
Melting Butter and Mixing with Cereal
Melt 2–3 tablespoons of butter and toss it with about 1½ cups of Fruity Pebbles in a bowl. Stir gently until all the cereal is coated. This light butter coating helps the cereal “stick” and crisp up a bit in the oven, giving your topping that satisfying crunch.
Layering Cereal on Cheesecake Before Baking
Sprinkle the buttery cereal mixture over the cheesecake layer. Don’t press it down—just let it sit on top naturally. It’ll bake in place, and pressing could flatten your cheesecake.
Pop the whole pan back in the oven and bake for 18–22 minutes, or until the edges are set and the center jiggles just slightly when shaken.
Cooling, Cutting, and Serving the Bars
Let the bars cool at room temperature for 30 minutes, then refrigerate for at least 2 hours—overnight is even better. Cold bars cut cleaner, and the flavor deepens as they chill.
Tips for Clean Cuts and Beautiful Layers
- Use a sharp knife, wiped clean between each cut.
- Run your knife under hot water and dry it before slicing for perfect edges.
- For extra presentation points, add a few loose Fruity Pebbles on top just before serving to refresh the look.
Tips and Tricks for Perfect Fruity Pebbles Cookie Cheesecake Bars
Whether you’re a seasoned baker or trying Fruity Pebbles Cookie Cheesecake Bars for the first time, a few smart baking tips can make the difference between “just okay” and “absolutely amazing.” From handling the crust to nailing the texture, these practical tricks will help you bake bars that taste as good as they look.
Common Mistakes to Avoid
Even the easiest recipes can go sideways without a little attention to detail. Here’s how to keep your bars from flopping.
Overmixing the Cheesecake Filling
Once the egg goes in, be careful not to overbeat the batter. Overmixing adds too much air, causing cracks and uneven texture. Stick to low speed, and just blend until smooth.
Using Cold Ingredients
It’s tempting to grab ingredients straight from the fridge, but room temperature cream cheese and egg mix more easily. Cold cream cheese leads to lumps, which nobody wants in a silky cheesecake layer.
Pressing Down the Cereal Topping
It might feel like packing the topping in helps it stick, but don’t do it. Pressing the Fruity Pebbles down can make them soggy or crush their shape. Instead, gently sprinkle them on top right before baking.
Getting the Texture Just Right
One of the best things about Fruity Pebbles Cookie Cheesecake Bars is their perfect balance—crunchy top, creamy middle, chewy base. But getting there takes a little care.
How to Know When They’re Fully Baked
The edges should look set and firm, but the center should have a little jiggle—kind of like Jell-O. If the whole thing looks wet, bake for a few more minutes, checking every 2–3 minutes to avoid overbaking.
Why Chilling Makes All the Difference
Letting your bars chill is crucial. Not only does it firm up the cheesecake, but it also lets flavors develop and meld. Two hours is the bare minimum—overnight is best for clean cuts and a rich, dense texture.
Variations on Fruity Pebbles Cookie Cheesecake Bars
Sure, the original recipe is a winner, but don’t stop there. These bars are super customizable—whether you’re switching flavors or tweaking the texture. Let’s explore some of the most delicious twists you can try.
Flavor Variations Using Other Cereals
Sometimes, you want the Fruity Pebbles Cookie Cheesecake Bars experience with a new spin. Good news—you’ve got options.
Cocoa Pebbles, Lucky Charms, or Cinnamon Toast Crunch
- Cocoa Pebbles give your bars a chocolatey twist—perfect with a chocolate cookie base.
- Lucky Charms add a fun marshmallow element and a little extra whimsy.
- Cinnamon Toast Crunch offers a warm, spice-forward flavor that pairs beautifully with a vanilla cheesecake layer.
Mix and match to discover your own favorite combo!
Making Them Gluten-Free or Dairy-Free
You don’t have to miss out if you’re on a restricted diet. Here’s how to adapt the bars to suit different needs.
Using Almond Flour or Dairy-Free Cream Cheese Alternatives
- Swap the cookie crust with a gluten-free sugar cookie dough or an almond flour crust for a similar texture.
- Use dairy-free cream cheese, such as cashew-based or coconut-based versions, and plant-based butter to keep it creamy and rich without the dairy.
- Always double-check the cereal box—some versions of Fruity Pebbles are naturally gluten-free, but labels change.
Serving Suggestions for Fruity Pebbles Cookie Cheesecake Bars

So you’ve baked the perfect Fruity Pebbles Cookie Cheesecake Bars—now what? Whether you’re hosting a celebration, planning a kids’ party, or just treating yourself, these bars can shine in all kinds of settings. Let’s dig into how to serve them for maximum fun and flavor.
Perfect for Parties and Colorful Events
Thanks to their eye-catching colors and nostalgic flavor, these bars are an instant hit on any dessert table.
Great for Birthdays, Holidays, and Potlucks
Bring them to:
- Birthday parties – Kids love the bright rainbow look.
- Holiday gatherings – Add a festive twist with colored sprinkles or themed cereal versions.
- Potlucks or bake sales – Easy to transport and slice, these bars always grab attention.
Place them on a tiered dessert tray or platter with a small sign—they’ll vanish in minutes.
Creative Ways to Present the Bars
With a little imagination, you can turn these bars into a show-stopping centerpiece.
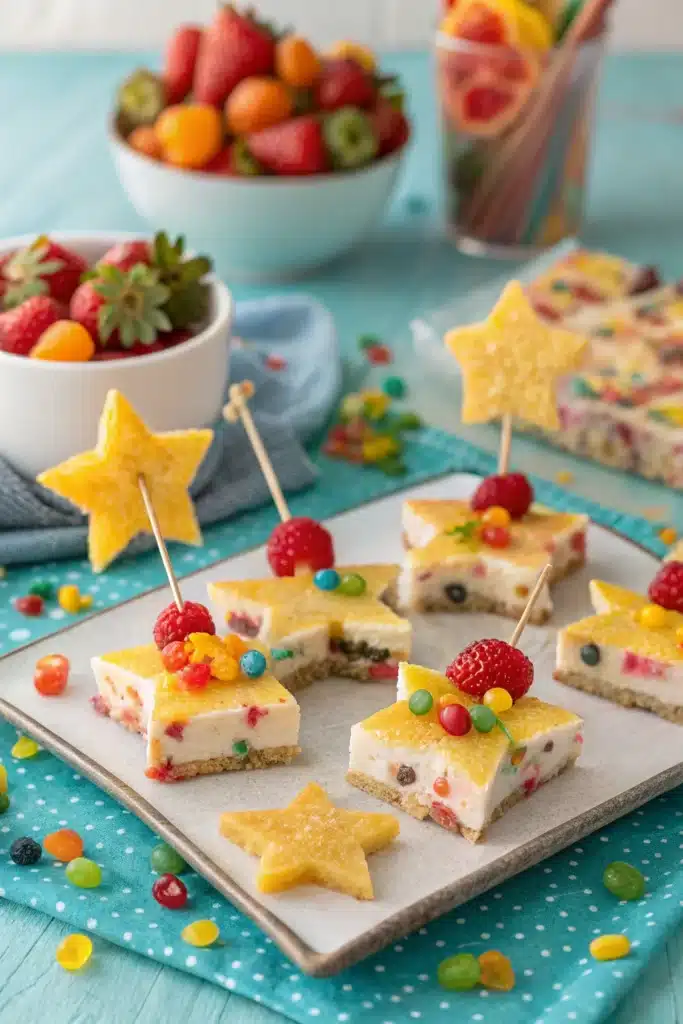
Cutting Into Shapes, Skewers, and Layered Cups
- Use cookie cutters to cut them into stars or hearts for special occasions.
- Slide small squares onto mini skewers for dessert kebabs with fruit chunks.
- Layer crumbled bars in dessert cups with whipped cream for a colorful parfait.
Not only do these ideas make dessert more fun, but they also help with portion control—win-win!
Storing and Freezing Fruity Pebbles Cookie Cheesecake Bars

If you’ve got leftovers—or just want to make a big batch ahead of time—good news: Fruity Pebbles Cookie Cheesecake Bars store beautifully. With the right techniques, you can keep them tasting fresh and fabulous for days (or even weeks!).
Short-Term Storage in the Fridge
Storing your bars in the refrigerator keeps the cheesecake layer safe and the crust chewy.
Best Containers and Shelf Life
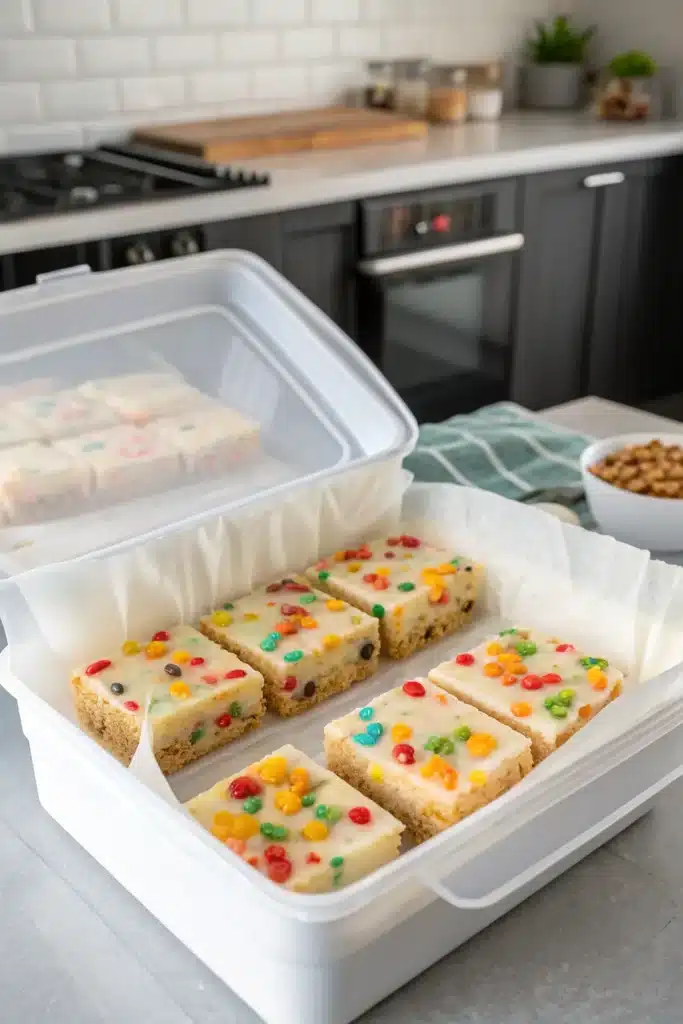
- Use an airtight container to keep the bars moist and prevent the cereal from going soft.
- You can also wrap the bars in parchment and stack them in a plastic container.
- In the fridge, they’ll stay good for up to 5 days—if they last that long!
Place a paper towel inside the container to absorb extra moisture and keep the topping crisp.
Freezing for Long-Term Enjoyment
Want to make a big batch ahead of time? These bars freeze surprisingly well.
How to Wrap and Thaw for Best Results
- Let the bars chill completely before freezing.
- Wrap each bar in plastic wrap, then place them in a zip-top freezer bag.
- Freeze for up to 2 months.
When you’re ready to enjoy them, move the bars to the fridge and let them thaw slowly overnight. Avoid microwaving—they’ll lose their texture fast.
Looking for a refreshing side dish? Try this vibrant and creamy Kiwi Avocado Feta Salad Recipe to add a healthy twist to your dessert table.
Frequently Asked Questions about Fruity Pebbles Cookie Cheesecake Bars
Here are the top questions people are asking about Fruity Pebbles Cookie Cheesecake Bars—based on Google’s “People Also Ask” section and queries from AnswerThePublic.
What are Fruity Pebbles Cookie Cheesecake Bars made of?
These colorful bars are made with a chewy sugar cookie crust, a creamy cheesecake center, and a crunchy topping of Fruity Pebbles cereal. Some recipes may also add white chocolate chips or vanilla extract for extra flavor.
Can I make Fruity Pebbles Cookie Cheesecake Bars ahead of time?
Absolutely! These bars are ideal for making ahead. In fact, chilling them overnight actually improves the texture and makes cutting easier. Store in the fridge in an airtight container for up to 5 days or freeze for up to 2 months.
Do Fruity Pebbles Cookie Cheesecake Bars need to be refrigerated?
Yes. Because of the cheesecake layer, they should be kept in the refrigerator when not being served. This keeps them fresh and safe to eat.
How do I keep the Fruity Pebbles from getting soggy?
To keep that signature crunch, gently press the cereal on top just before baking and avoid overpacking it. After baking, make sure to store the bars in a dry, airtight container and avoid stacking them without a barrier.
Are Fruity Pebbles Cookie Cheesecake Bars gluten-free?
The classic recipe isn’t gluten-free due to the cookie crust and some cereal variations. However, you can easily substitute a gluten-free cookie dough base and use certified gluten-free Fruity Pebbles to make them celiac-friendly.
Can I use other cereals instead of Fruity Pebbles?
Yes! You can swap in cereals like Cocoa Pebbles, Lucky Charms, or Cinnamon Toast Crunch. Each one offers a fun twist on the original while keeping that crunchy, colorful vibe.
Conclusion: A Sweet Spin on Nostalgia with Fruity Pebbles Cookie Cheesecake Bars
Fruity Pebbles Cookie Cheesecake Bars combine bold colors, chewy textures, and creamy sweetness into one unforgettable treat. Whether you’re baking for a birthday bash, a bake sale, or just a Tuesday night craving, these bars bring joy in every bite. And with endless ways to customize, store, and serve them, they’re not just dessert—they’re a celebration.
Craving something cold with your bars? Discover great ideas like this rich and creamy Chocolate Shoppe Ice Cream to serve on the side.

